 Get your essential tools ready:
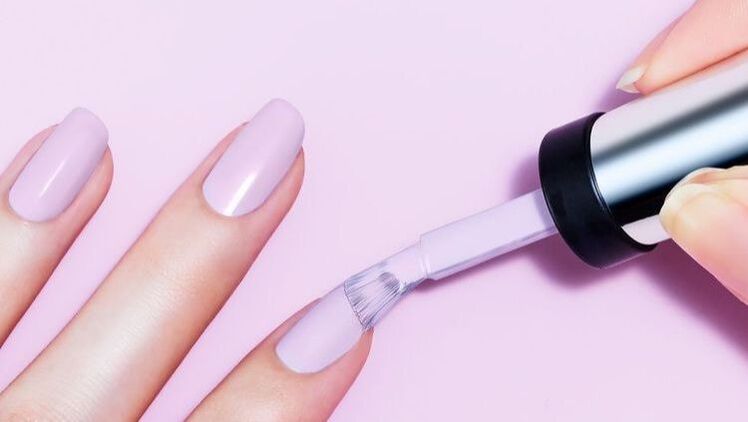
1. SHAPE Trim your fingernails with nail clippers (unless you prefer to keep your length). When cutting your nails, never start in the middle. Begin on the side and work your way across so you don't split the nail. If you have long nails, it's especially important to start your at-home mani with a pair of nail clippers, rather than try to file down an excessive amount of growth. 2. BUFF After you've filed, it's time to buff the nails in order to create a smooth. To buff your nails, you'll need to glide a nail buffer across each nail for a few seconds, moving back and forth until you can feel (and see) that the nail is smooth. 3. CUTICLES Rub in cuticle oil directly on your cuticle using your fingertips, and softly but firmly push back the cuticle to reveal the nail plate. This helps the nail look more elongated. 4. WASH After you've applied oil and gently pushed back your cuticles, it's time to wash off the oil. This is the part of the in-salon manicure where your manicurist may ask you to go to the sink and scrub your nails with a nail brush and a bit of sudsy water. Do the same when you're at home because oil on the nail plate is the biggest cause of chipping! 5. BASE Rest your hand on a table to keep it steady – begin with a thin layer of base coat polish. This will help ensure a more even color application, and it also prevents the polish from staining your nails. Let the base coat dry before moving onto the next step. 6. COLOR It’s time to start painting! When applying color, start in the middle of the nail bed and work your way to the sides in thin, even layers and paint the tip of the nail as it helps seal the color. Always apply two coats of color (minimum), waiting several minutes between each coat to prevent dents and bubbles. 7. TOP Finally, you'll want to apply a quality topcoat polish. This will help seal your color, make it shine, and prevent it from chipping. Re-apply your top coat every two to three days to prevent chipping and to help keep your mani looking fresh. Don’t forget to keep hydrating your hands throughout the day to ensure that your manicure stays fresh and your cuticles healthy!
25 Comments
 We faced challenges we never could’ve imagined in 2020 - but we like to think that it’s given us the opportunity to appreciate everything we are so blessed with. It has taught us not to take our health for granted, that family and friends are number one and never underestimate the importance of taking care of ourselves. We are honoured to be a small part of your pampering - that something that makes you feel special and beautiful. YOU are the reason we love what we do.
Polish Nail Bar has been recognized for consistent excellence in the pursuit of total customer satisfaction, and we are SO EXCITED to announce that we have been nominated for Top Nail Salon of 2021 in Ottawa! As the recipients of the 2018, 2019, and 2020 award, we pride ourselves on our customer-first approach to beauty. We owe it to our supportive customers who allow us to do what we love! We would be extremely grateful if you would extend your support, by voting for us, at voteforus.ca and search for "Polish Nail Bar". Show us a screenshot of your vote confirmation for 10% off your next purchase! Thank you all, again, for your unconditional and endless support! - PNB 
 I think we can all easily agree that mani/pedis and eyelash extensions have been the best thing to come along since sliced bread. Our cured polishes — flawlessly covered with extreme shine — have allowed us to go for weeks without thinking about doing it from home.
Times are strange (to say the least), and in a matter of a few days, we’ve staggered into a global pandemic. We’re all faced with an influx of new restrictions, including social distancing rules and spas and salons being temporarily closed. We’re all doing our part to stop the spread of COVID-19, which means #StayHome. In the meantime, what do we do with our gel nails? The removal process is, well, a process! That’s why most of us leave it to the skilled nail artists and technicians to deal with when we transition from an old polish job to a new one. Pandemic or not, nails are going to continue to grow, and if your manicure is on the brink of total collapse, it’s time to take removal matters into your own hands—and we’ll tell you how. Gather a few supplies and follow the instructions below, as we walk you through removing your powder and shellac manicure at home 💅🏼
*Acetone can be very drying to your skin. It is important to remove any residue and apply moisturizer. Feel free to email us at [email protected] with any questions 💌 |
Archives
February 2021
Categories |
 RSS Feed